https://web.archive.org/web/20220311020340/http://www.members.optusnet.com.au/nswmn/

https://web.archive.org/web/20220311020340/http://www.members.optusnet.com.au/nswmn/
Above photo is my Gosford complete with the Overhead. Click on the photo to see the Main North Album at Flickr

Tuesday, December 29, 2015

Layout Changes.

On my Main North layout, the "Main North Line" terminated at Armidale Staging a few feet north of Werris Creek Station and on the "wrong" side of the Station. The Mungindi Branch line crosses the Lift Up Bridge through to Gunnedah and then through a Return Loop, providing easy turning of a train and continuous running if necessary.

Recently I "fine tuned" and "electrified" the Points at Gunnedah's Black Jack Coal Mine located opposite Gunnedah and on a shelf 80 mm above the track, south of Werris Creek Yard. With the Gunnedah Abattoir and the Mine it provided some great train operations.

I had made some changes at Werris Creek to improve operations that included repositioning the Roundhouse and Turntable, adding the Shunting Neck and adding a second line into the Yard for the "main line", providing a more direct path to the Station. This eliminated a Crossover that was giving me some grief (Shinohara Double Curves - what a pain in the proverbial).

I wanted to add a Stock Yard and Loading Bank for additional operations around Werris Creek but there was no room to do it unless I removed Gunnedah's Black Jack Coal Mine. A monumental decision had to be made as Gunnedah was an important part of my layout.

Due to the "people traffic" in the Aisle between Sulphide Junction and Broadmeadow, I had removed the 300 mm high Platform that was necessary to operate Gunnedah so there was not much happening at the Black Jack Coal Mine so Gunnedah had become a "through" station as North West trains used the Return Loop to turn around trains.

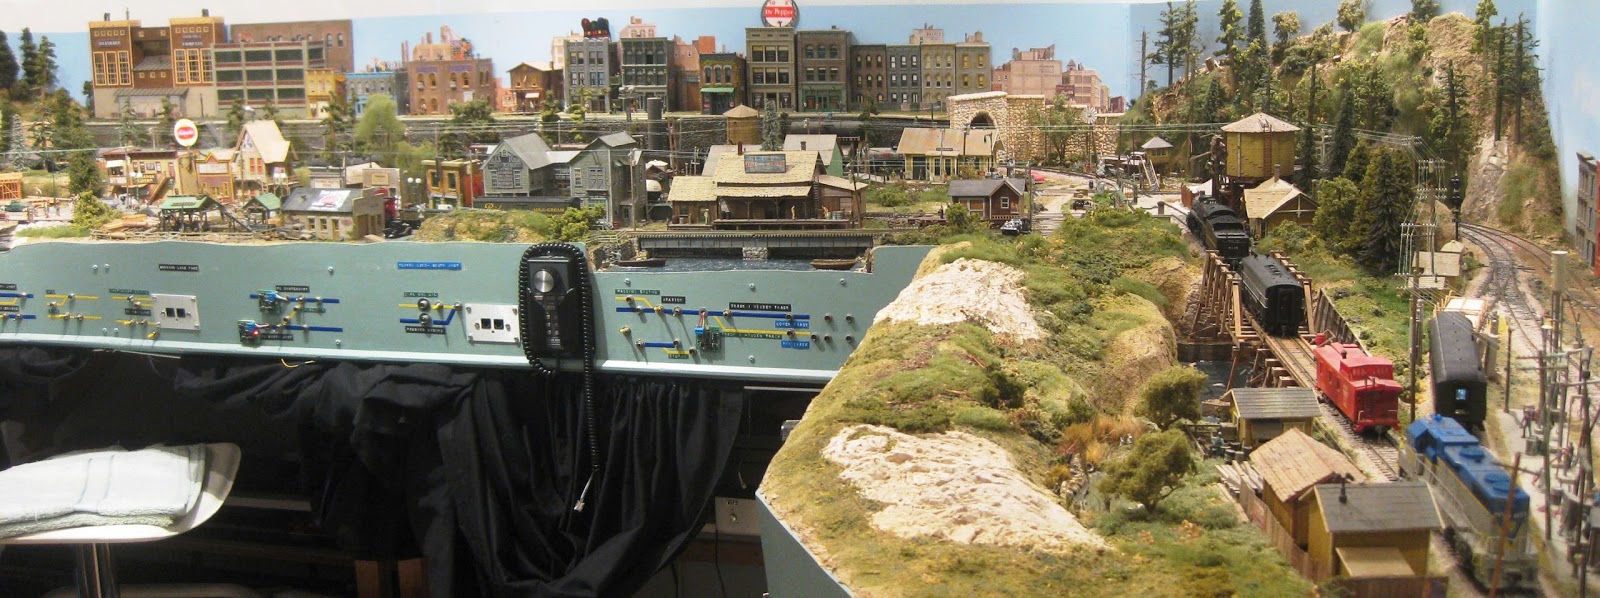
Layouts "evolve", so I removed the Mine and the associated track along with the Abattoirs and now I had room for the Loading Bank and Stock Yards. These could be operated from the Train Room, see below. I have included the Werris Creek Mine (seen in the background of the above photo), so LCH Coal Trains will be running from/to Werris Creek.


With these above changes the 3 "signature" Main North Passenger Trains - the Brisbane Express via Wallangarra, the Glen Innes Mail and the 4 Car DEB Set Northern Tablelands Express that I've now got all the correct rolling stock for (mentioned last post), would STILL be terminated at Armidale Staging, 3 feet away from Werris Creek Station.

The "importance" of Gunnedah without the Mine and Abattoir was drastically reduced. To provide a 25 foot longer "Main North"and the Return Loop for these 3 Passenger Trains etc, I've swapped around the two sections of track "north" of Werris Creek, see the Track Plan below.


The below photo shows the Glen Innes Mail having arrived on the "correct" side of the Station, departing and continuing on the additional 25 foot section of the Main North line (previously the Mungindi Branch), heading across the Lift Up Bridge to West Tamworth.


Gunnedah Station/Yard with the Mill and Silo will now be my "close enough" combined West Tamworth/Tamworth and the previous Armidale Staging (3 feet from Werris Creek) will now be the North West Staging. A new Armidale Staging above Newcastle (Middle Deck), will be added later.


Shown above is one of the signature Passenger Trains of the Main North, the 3616 hauled Glen Innes Mail, double headed to "light engine" 3390 to West Tamworth for the Barraba Passenger. Operating Trains on the Main North and the The Glen Innes Mail, are the topic for my next Blog entry.

Tuesday, December 15, 2015

Passenger Trains for the Main North.

Over the years of building the Main North I have mainly concentrated on Goods trains with just a few Passenger trains, namely the:
  • 3801 hauled Newcastle Flyer HUB Cars,
  • 3076 hauled Toronto Passenger FOs, 
  • An 8 Car Interurban U Boats - Syd/Gos/Syd.
  • A Northern Tablelands Express using a RUB Set until I get a DEB Set.
For years I've been collecting all manner of stuff that's required when building a layout and storing it under the layout with a hope of using it some time later, just like "normal" model railroaders. The Main North is a "mainline" layout so I really needed to make up some more passenger trains, including some "Mails".Those Lima 12 wheelers, Austrains and Powerline passenger coaches under the layout, are now going to see the light.

The chance of purchasing some rolling stock in the dismantling of Keith's layout (mentioned on a previous Blog entry), I once again forgot about passenger trains and only purchased goods wagons.

Using the NSWGR Train Composition and Marshalling Book, I made a list of the extra Passenger trains that ran in 1965 on the Main North, listed below. I needed quite a few pieces of rolling stock marked in bold and italics.
  • Brisbane Express via Wallangarra.- HKL (at WCK) MHO BS TAM FS FS EHO,
  • North West Mail - EHO MHO KP CS TAM FS.
  • Glen Innes Mail - ACS CR MHO MHO TAM BS FS EHO.
  • North Coast Daylight Express - RUB Set.
  • North Coast Mail - MLV MHO MHO KP FS TAM BS.
  • All stops Newcastle/Gosford/Newcastle Passenger trains - 4 and 6 FOs.
I contacted Bob Stack as I knew he was selling his NSW rolling stock. Bob came to the rescue with all but two coaches for the Glen Innes Mail  (ACS and CR). I made a few "substitutions" namely LHOs for EHOs and a Elliptical High Roof Mail Van for the HKL. 

The Epping Club Market Day would provide an opportunity of getting the two missing coaches but I'd decided I'd go with what I had. Well that statement only lasted a few days when a mate rang me and said there was a CR on Ebay and the auction ends in 4 hours. I was not a member of Ebay or Paypal, I joined the Ebay and I made a couple of bids on the CR. I won it. On delivery I was pleasantly surprised that the CR looked better in the flesh than in the photo. My nearly correct Glen Innes Mail is shown below.


I went to the Market Day to catch up with a few mates and had a look at what's for sale. Charlie from Canberra had a "ACS" decaled Lima MBE. Essentially I paid $20 for an ACS decal because I now have a spare MBE. I now have a "correct" Glen Innes Mail.

While talking to Allan Garbutt who was helping on Phil Collins' table, Allan showed me a box and said I badly needed "these" on the Main North. I looked at the label on the box and said "No way it's a kit!!!" I'm a Plonker now and time I spend on my hobby needs to be on the building/scenecing the Main North. Allan opened the box and said: "It won't take too much time to finish them as they're all painted and you desperately need a DEB Set Northern Tablelands Express, make Phil an offer". With a pause from Phil, I was now an owner of a 4 Car DEB Set.

I installed a Diesel Econami decoder, selecting the EMD 567 Non Turbo Prime Mover sound that'll provide a "close enough" sound for the DEB Set. I needed to power the second Power Car's motor. I thought of adding a motor only decoder for this but thought locos always need extra pick ups. I decided to run a 6 conductor harness through the 4 Cars - two wires to connect all the bogie pick ups, two wires to power the second motor and two wires for the second speaker. With this harness, it's a real pain in the backside to handle this 4 Car Set but they can be separated if necessary.

When you get to be an old fart like me, it gets hard to read the small numbers on the side of these coaches, so I decided it's number would be 904 (900 for DEB Set and 4 for the 4 Car Set), also I was already thinking of having a 3 Car set - see below.

Operating the 4 Car Northern Tablelands Express from Sydney to Werris Ck and return, I now wanted to have the "real" thing, so I needed to find 3 extra cars. When the N/T Express arrived at Werris Creek, it split into two trains - 4 Cars to Glen Innes and 3 Cars to Moree. I also wanted to replicate this "operation" on my layout. I NEEDED a 3 Car DEB Set and luckily Lloyd Sawyer was able to fix me up.

The 3 Car DEB Set has only one motor. I installed a another Econami decoder into the "motored" Power Car. I used a SBS4DCC 15 x 11 x 8 mm Sugar Cube speaker that I'm fitting to all of my locos. Without the need for connecting a second motor, I thought I'd try the Power Car on the track. It kept cutting out/stalling due to a lack of pick ups and the fact that the Bowser Bogies have brass wheels. I installed a TCS KA2 (200,000 uF) Stay Alive and now it runs without stalling. If it stalls anymore I'll add another KA2 (in parallel). Adjusted the decoder's address to guess what - 903 for the same above reason.


I have finally (May 2016), fitted lights to the "end" Cars of the 7 Car Set, using LEDs and fibre optic cable. This provides the necessary lights from Werris Creek to Sydney and return but one end of the 4 Cars Set to Armidale won't have lights. A small price to pay for the huge saving in time installing the lights


Now with these extra Passenger trains, I need some more Staging Tracks. They will be easily added at Sydney (obviously) and some at the Northern End (Upper Deck) beyond Gunnedah that will be renamed to "West Tamworth" for reasons that'll be explained in my next Blog entry about running Passenger Trains on the Main North.

I was very conscious of operating a RUB Set Northern Tableland Express on my 1965 time period "Main North".

Thanks to some "arm twisting" from Allan and Lloyd and Phil's generosity, I can now sleep at nights knowing I am running the "right" train.


See the DEB Set operating up the the Liverpool Ranges between Pangela and Ardglen at:


Tuesday, July 14, 2015

How Lucky are we to have a Hobby.

I have been reminded again, how lucky we are to have a hobby.

John a DCC modeller asked me if I could fix an electrical problem on his layout the “Tupper Lake and South Junction” as I had previously repaired his DCC system.


John and his wife live in a Unit with his layout in the 10’ x 12’ spare bedroom. The layout is finished with many finely detailed buildings and all the scenery is done. John’s grandson is installing lights in all the buildings.  

John has had both of his legs amputated and has to use a Frame, luckily the layout was mostly completed. Not to be sidelined, he is mobile enough to keep up his modelling. The third Bedroom has the Computer and a large Workbench where John does most of his modelling these days.

John is a member of the NMRA and is working on the Achievement Program that will hopefully culminate in him being awarded an MMR - Master Model Railroader. When I visited, he is working on a “Track Module” where he has hand built Points and a Crossover. John has 4 out of the 7 AP Certificates necessary to be awarded the MMR.

John’s wife Wendy said to me, we are very lucky that John has his model trains, it has kept him sane, active and busy.

Wendy’s comments reminded me, those that have a hobby are very fortunate, more so for us that are retired, there is always something to do that keeps us active.

My recent Blog entry about dismantling Keith's layout and his model railway Journey over 40 plus years, reiterates how lucky are we to have a Hobby. Both John and Keith are 84 years "young" and I hope I am as active and as young as John and Keith are, when I'm 84.

John and Keith, you two modellers are INSPIRATIONAL.

Click on the Slideshow Icon at Flickr for a photo tour of both John's and Keith's layouts.

John's "Tupper Lake and South Junction"  

For a YouTube video of John's layout, taken in May 2017, click here.

Keith's NSW layout

Thank You, John and Keith.

John passed away on 23rd June 2017. I have lost an "Inspirational" Friend. I did not know John for long. His Eulogy provided me an insight to his life, a devoted family man that lived life to the fullest with his wife Wendy always at his side. John leaves us but not before reaching the pinnacle of this Hobby, becoming an NMRA Master Model Railroader. John, you are more than a "Master" to us. You'll be sadly missed but remembered forever. John - Rest In Peace. 

Keith passed away in August 2020 - Rest in Peace, Keith.

Saturday, July 4, 2015

Speedo Car for Speed Matching Locos.

The most popular post on my Blog is my "30 MPH Max Speed Matching of all of my Locos", done in July 2010 with reference to my web page for making a Speedo Car. I recently made a Speedo Car for another modeller and I took some photos. Using these photos and the associated text you can make a Speedo Car for about $30 using one of your existing pieces of rolling stock.
Having a Speedo Car makes "speed matching" locos really easy.

An alternative to making the Speedo Car, purchase a module like the Train Speed 1 from TCS. See Ken Patterson's "What's Neat" series video, showing how he installed his TCS Speedometer

Parts for the Speedo Car.
Bicycle Computer from any Bike Shop. The one below is from Ecowell.
Casula Hobbies K wagon or similar. I assembled one from a kit years ago.
Metal Wheel Set for the K: 23.8 mm long 10.5 mm diameter (36") - Steam Era Part No W4 or similar.Your Wagon may be different, please check.
Magnet . I used the Wand supplied with Eureka Models sound locos and trimmed it to 6.5 mm see text.


Notes in Red added on 3APR2019.
  1. Mount the Sensor over the R/H Axle as shown in the Top photo.
  2. Cut Two Slots in the Sides of the K Wagon as shown.
  3. Carefully trim the Sensor's length with the Dremel as shown to eliminate too much overhang.
  4. Trim the sides of the Sensor.
  5. Drill a hole in the side of the Wagon to route the Sensor wiring back into the Wagon.
  6. I used a "square" Bike Computer as shown. Nov 2021, I used a $49 Ecowell BC10. 
  7. If necessary cut a Slot in the Floor for the Bike Computer's Clip, so it sits rigidly, see below.
  8. I used a K and M Axle with 10.3 mm Wheels and ground a "flat" on the Axle to easily secure the Magnet, see below.
  9. Using your Dremel, trim the Wand Magnet to 6.5 mm. DO NOT make it any longer. I made a 10.0 mm Magnet from a Wand and it DID NOT work with the Echowell BRI 8.
  10. Glue the Magnet to the Axle with 5 Minute Araldite and fit Axle to the Wagon.
  11. Trim the Sensor wiring for a neat fit.
  12. Before joining the wires, you have to CHECK the magnet/Sensor operation. Easier now.
  13. Connect the Sensor to a Multimeter, SET to OHMs.
  14. With the magnet "away" from the Floor, the Meter should show infinity (Open circuit).
  15. Rotate the Axle so the Magnet is CLOSE to the Floor, the Meter should show ZERO (short circuit).
  16. If the Sensor shows SHORT all the time, the Sensor will have to be RAISED above the floor.
  17. If the Sensor shows OPEN (infinity) all the time, the Sensor will have to LOWERED. Grind away the face of the Sensor and/or the floor.
  18. When the Sensor shows ZERO Ohms ONCE (close to the floor) in 360 degrees of Axle rotation, the Sensor and Magnet are set up correctly.
  19. Fit some 3.0 mm heat shrink to the two wires.
  20. Solder the connections then shrink the heat shrink. Note: The Echowell BRI 8 wiring is difficult to solder. The strands of the multi strand wire are covered with insulation. Use your Soldering Iron turned up to 450 degC to melt the insulation. Use the normal Temp setting to solder the wires together. 


Adjusting the Bicycle Computer for correct operation.

For the Bike Computer arrangement, the unit will need to be programmed with a "multiplier" determined by the diameter of the Wheel to provide a "one pulse" per revolution signal. Counting these pulses over time time, the Computer displays KPH/MPH.

Since we modellers want scale KPH/MPH for our scenario and the Wheel of the K Wagon is a "scale" 36 inches in diameter, we use the SAME "Multiplier", as above.

Using the Instructions, you'll find a value close to the one I used in my original Speedo Car and what I programmed into my new Speedo Car. That is 2873. For my Ecowell BC10, I again used "2873"  Check your individual Bike Computer Manual.

You need to program your bike computer with is "2873".

To check your calibration:
  1. "Mark" 3 feet of straight track on your layout.
  2. Operate a loco at 10 MPH as indicated on the Speedo Car
  3. Using this 36 inch "Speed Trap", time the loco.
  4. It should take 18 seconds.
  5. If shorter/longer then you may need to change the "Multiplier".
  6. Don't be too pedantic here - close enough is good enough.
For a good Speed Calculator see:

Scale Speed Calculator

From the above, hopefully everything has worked out okay and you're ready to "Speed Match" your locos.

While I use 30 MPH for my maximum speed you can use what ever speed you desire.


Sunday, June 28, 2015

Missing on the June Long Weekend Exhibition.

Normally I look forward the Epping Club's Exhibition on the June Long Weekend, always a great show but this year I was asked if I'd like to accompany my Son Matt on a 4WD crossing of the Simpson Desert with 7 other 4WDs.

This opportunity does not come often especially if you don't own a 4WD. I read and was told, crossing the Simpson Desert should be one thing on your "Bucket List". After doing the "crossing", I agree. There's always next year for the exhibition but a once in a lifetime experience spending two weeks with my Son, so it was off to the Simpson Desert instead of "trains". What a BIG call.

Even bigger kms to get there - 2,400 kms to Dalhouise Springs S.A. via Mildura Vic, Port Augusta S.A and Kulgera N.T. and 2,100 kms from Birdsville QLD via Bourke, home. We did the easier "easterly" 500 km crossing of the Simpson Desert - all sand and lots of Sand Dunes and took 5 days so the other 4,500 kms, took 5 days. I was pulled over at 3.30 AM at Coober Pedy S.A. in the pouring rain, and breath tested. They are dedicated police in S.A. Going the other way, I only passed 2 trucks (road trains) and a car in 6 hours on the Stuart Hwy.

How can I add this desert experience to my layout? It seems too good an opportunity to add something personal to my layout. We crossed both the old (replaced in 1980) and the new Ghan Railways, some 2,000 plus kms from Gunnedah, the furthest north west location on my Main North but with some "selective compression", I'll add the Simpson Desert, well the highest Sand Dune "Big Red" (35 metres), to my North West Staging. I bought some sand back from "Big Red", just west of Birdsville. One day soon you may see a Sand Dune and some 4WDs on the Main North.

A fantastic experience but only possible if you own or can be a passenger in a 4WD. If you are interested in seeing some photos and a 30 second video climbing "Big Red" see:

https://www.flickr.com/photos/131887990@N06/sets/72157654377670051

Now back to playing trains.

Yesterday I ran my 4803 a latest Powerline 48 equipped with what I consider the best diesel sound - Loksound 244, to get back into trains. It kept cutting out even though it had a TCS KA2 Keep Alive. Last night I dismantled the bogies and cleaned out all the black crud around the axles/bearings and it again runs great. So if your latest Powerline 48 runs like crap, dismantle the bogies and clean the axles/bearings.

Saturday, April 18, 2015

What's been happening at the Main North lately.

I have finally relented and joined Facebook and if you have requested that you wanted to be a Friend, don't be offended if you have not got a reply, my Inbox has been bombarded. I know I cannot be that popular (or can I be?), I have now setup my Inbox so that your messages go a Facebook Folder. Now things are back to normal in my Inbox. One day when I can get away from doing scenery, I may accept your request.

I joined Facebook after a mate suggested there are heaps of photos being posted "daily" and all I wanted was to view them to help me "replicate" the scene.

The last few days while having a Coffee breaks from layout work, I have added a Blog List and Photos to my Blog (could not get the Blogger Slideshow to work, I even posted photos to Flickr) and today I changed the way the Blog looks.

Managing a Blog and Web site is very time consuming. I am on a mission to get as much of my layout done before my Son takes me to the Simpson Dessert in early June. Perhaps when he sees the lack of progress around the house and listening to "Mum", he may leave me there.

Recently I have helped Keith an 83 year old modeller, dismantle his beautiful fully sceniced NSW HO layout in a room approximately 20' x 20' (shown below), due to a forced move into a much smaller residence, something many of us will also have to consider at some time. A few days ago he said the house was sold.


In the next few weeks I will "cut up" his layout for the Skip Bin. A very traumatic experience for Keith who with some of his model railway friends, have been meeting at his place/layout for over 40 years. As I purchased some of Keith's models and structures, hopefully Keith and Bob, (the only 2 left), can see some of "their" layout on my Main North when they visit to get their train "fix".

I missed out on the "Loco", the Mine and some other buildings, they went to the Werris Creek Museum.


Included in the Structures was a Stock Pen and the inhabitants, I needed a place for them.

At the recommendation of one of the visitors to the Main North, I needed to have a Shunting Neck for Werris Creek so this was a good opportunity to find a place for the Stock Pens. I removed Gunnedah's Black Jack Coal Mine that took me days to get it to work properly - now all amounting to nothing and replaced it with the Stock Pens and a Loading Bank, Werris Creek will now have a Coal Mine, utilizing the "old" Mine, a little "south" of the Pens/Bank.

Installing the Shunting Neck, Werris Creek Yard was "reorganized" and the Anton's 75' Turntable was moved about 12 inches (300mm). I even drilled 44 mm holes for all those Peco Point Motors I have purchased 20 years ago, onto the layout - one day maybe. Now instead of the Main line being at the front (layout aisle), it is at the "back", passing "Loco" as it turns into Werris Creek Station. I have got a great 3 deck Station building from Ray P that will do for Werris Creek till I make one, maybe.

I'll NEVER be able to build everything including doing the scenery on my large dream layout, so to "play" trains on more than a plywood junction, I'm now a "Plonker" that provides "instant" results. Along with John P's Mudgee building and Keith's models, the Main North is now reasonably "populated" and about 40% sceneced, Now the layout is ALIVE, "playing trains" is so much fun.

Thanks a LOT Keith.

If only I could be more disciplined at finishing a "project" but I seem to get easily "side tracked".

There was some unused real estate at the bottom of the stairs at the entrance to the Train Room. I have utilized this space by adding two levels, albeit a little too short for staging trains - Armidale staging 3 sidings, at the top and the Port Waratah Wheat Terminal (lower). I've located my "Library" in the area under the Wheat Terminal, making grabbing a book, easy for the "visit" to the downstairs W.C.

Adding scenery to Werris Creek and the track out to Gunnedah on the Upper Deck as it passes the Gunnedah Mill, I took the opportunity the upgrade my Workbench lighting and replaced the twin 40 watt Fluro, with two 18 Watt CFLs, I'm also a Greenie at heart, This would be "music"to my older son's ears, if I really said this.


The Main North's "Nerve Centre" with a reasonably clean Workbench. Years of time have been spent here while installing decoders, many for other modellers, making and maintaining a web site and this Blog.

One of the most important things about spending all of these hours, the area is a PART of the house. The Boss can even talk to me as I'm working on the Bench. I'm so lucky not to be "out the back" in a Shed etc and being on the ground floor, it is cool in the Summer and warm with the aid of a Heater and a couple of jumpers, in the Winter.

Again today I've been "side tracked" big time. It's now 2.30 pm and I've been at this computer since 7.30 am. Being a "one fingered" typist doesn't help. Going downstairs to do some scenery, after a cuppa. Always finding an excuse.

Last Friday the 17th April 2015, I have been retired for 3 years.

WHERE has ALL the time GONE?

In any event I've had heaps of fun mostly about my trains and that's what it's all about.

Maybe you can find a loco or two or some Rolling Stock from Keith's "FOR SALE" List at:

http://www.members.optusnet.com.au/mammann/Sale

Saturday, April 11, 2015

Know Your Loads & the 2015 Epping Seminar.


Yesterday (11April15), about 80 modellers attended the 2015 Epping Seminar hosted by the NSW division of SCMRA. This year's theme was "The Goods Train - The Guards Van Era". Another great day of modelling tips, prototype information, a hot lunch and catching up with mates, acquaintances, meeting strangers etc, for a yak. The Day's program included:

The Day of The Goods Train - John Parker.
Railway Timetables and Lines - Trevor Moore.
Shunting Signals - Dale Richards.
Pickup Goods and Trip Trains - Josh Beveridge.
Tarps - Have You Load Covered - Doug Blunden.
Weathering Wagons - Aaron Denning.
Goods Wagons and Loads - Trevor Moore.
Modelling Steel Wagon Loads - Garth Wiseman.
Know Your Load - Marcus Ammann and Geoff Small.
End of the Train - The Guards Van - Trevor Moore.

Included in the fare, is a DVD of all of the day's presentations, where some will find out what they missed.

I need Aaron to weather or give me private weathering session for my locos, especially the 46s like 4623 he had on show - it looked really "life like". Great job Aaron. Aaron will be demoing his weathering methods at the Brickpit Exhibition on the 2015 June Long Weekend. Photo courtesy of Aaron.


Unfortunately I will miss the Exhibition as I'll be in the Simpson Desert with my Son and 7 other 4 wheel drivers.

Recently (the last few years), I needed to get my "loads", prototypically  correct, initially due to my "banking" operations but I realized that ALL trains are controlled by the Ruling Grade for the section of track they are running on. In most cases, the steepest grade is the Ruling Grade, see your particular Gradient Diagram.

How much of a load that can be hauled is determined by the GRADE the train is to travel over and the type of loco or locos, hauling the train. To determine the LOAD of the train, we have to know:
  • The applicable wagon's weight.
  • Whether they are empty or full.
  • The Grade of the track the train is running on.
  • The type of loco.
For this "calculation" you'll need Gradient Diagrams, Working Time Table's Load Tables (example below) and some reference for the Wagon Weights.

For my "Wagon Weights", I use Ray Pilgrim's Train Load Calculator, that can be downloaded with Ray's permission from:

https://drive.google.com/file/d/0B3-yhMq1W_9eeUJNSXhLYmYxelE/edit

Ray's Bylong Blog has lots of "Train Load" information posted in January 2014, at:

http://bylong.blogspot.com.au/2014/01/further-information-on-train-loads-and.html

Shown below is a Load Table from the Northern Working Time Table (WTT) for Broadmeadow to Werris Creek section showing the maximum tonnage for each section for C32s, C36s and Standard Goods locos.


Using one of my "Main North" trains as an example, the 3613 hauled "through"Goods Train on the Broadmeadow to Werris Creek 156 mile section, the Ruling Grade in the 60s as explained by R. J. Booth's Murrurundi Article in Oct 81 Roundhouse is the 1 in 50 Murulla Bank restricting the Maximum Load to 385 Tons but 3613 will need assistance from Murrurundi up the 1 in 40 climb to Ardglen, as the limit is 255 tons.

Why the steeper 1 in 40 from Murrurundi to Ardglen is NOT the Ruling Grade, was due to that it was cheaper to operate 385 ton trains (C36) and assist the loco from Murrurundi up the climb to Ardglen, than to operate 255 ton trains over the whole section.

I made a video of the above 3613 hauled goods train being "banked" up to Ardglen.


Saturday, March 21, 2015

Sound for the 48s.


I have installed sound decoders into 3 versions of 48s - early and late Powerline and just recently into my long awaited Trainorama 48s. I have a DCC sound installation page on the latest Powerline on my web site at: http://members.optusnet.com.au/nswmn1/48Select3.htm using a Loksound Select Direct decoder with the prototypical correct 251B 6 cylinder sound and a MRC 18 mm speaker. I was never able to verify whether I had a 6 cyl sound but I hated the sound as it had too much turbo. On my layout, if I don't like the sound I'm not going to install it in my models. Call me Mr "close enough" sound man. Using Loksound decoders you can change the sound file but you cannot with Soundtraxx Tsunamis making it an advantage using the upgrade-able decoders.

The era for my Main North layout is 1965 - locos from from Gosford to Newcastle/Werris Creek were mostly steam. I only have a few diesel hauled trains - a Triple 48s "wheatie" (22 BWHs) from Werris Creek and a couple of "staged" 44 hauled North Coast trains - all hardly ever run. Two of my 44s are equipped with Loksounds with in my opinion, the bloody awful  turbo 251 sound, so I thought I remove the Loksounds and put them into my recently arrived 46s. I need a few "electric" sound decoders so Loksound is the go with the 46s. Thanks to Chris Winston I have a superb V4.0 Loksound equipped 46. Now to make "electric" sound for the these older Loksounds but for now the GG1 sound will do.

The 48s will not be run much and as I'm a cheapskate I thought I'd fit my old DSD100-LC diesels into 3 of my Trainorama 48s using the original speaker - tinny sound but cheap. Two of these DSD equipped 48s are consisted with the 244 Tsunami equipped 4th 48 that'll be the "lead" loco of the with it's Horn being the one that is sounded in the Consist. Many of my locos including the Trainorama 48s have the Sugar Cube speakers from Streamlined Backshop - fantastic sound until.....

Recently I had to help a modeller with his his Loksound Select 251 equipped 48. The sound was woeful, too soft and poor performance. I reloaded the sound project and tinkered with the Speed Table etc and it still sounded woeful. He previously suggested his other 48 had too much turbo sound. I loaded a 244 and fitted a 15 x 11 x 8mm Sugar Cube speaker from SBS4DCC.

WOW!!! what a difference. I took it to another layout to "show off" the sound and one modeller said it just sounds like what I remembers the 48s sounded like.

Today I upgraded all of my Loksound Select equipped Diesels with the Loksound Alco 244 Project No 73401 and I am "seriously" thinking of getting rid of my "steamers" and move to the 80s.

Investigating the "sound" of a 48 I found a few Youtubes, where for me, they sound like the 244 sound file for both Loksound and Tsunami. I made a movie (below) where I have added the "real" sounds and the manufactured decoder sounds for the loco when it's idling and accelerating, where an easy convenient comparison of the sounds can be made.

See what you think about the "244" 48s with the Streamlined Backshop 15 x 11 x 8 Sugar Cube Speakers, sounds like compared to the "real thing".


Also see my previous Blog post and for my 48 Decoder Installation web page, see:

http://www.members.optusnet.com.au/nswmn1/48T

Below video shows my Loksound equipped 4803 on my Main North layout crossing the Pages River, north of Murrurundi.


Tuesday, March 10, 2015

Sugar Cube Speakers from SBS4DCC - Unbelievable.


I have previously used small speakers that were advertised as Sugar Cube but these ones from Streamlined Backshop are going to revolutionize sound installations in small HO locos like in my fleet of NSWGR locos. The sound is amazing and their small size (15L x 11W x 8H mm) including Enclosure make them so easy to fit in any model.

Recently I added sound to my Trainorama 48s and the 17mm internal width of the body makes fitting a Speaker difficult, except in the wider Cabin part of the body, many including me, used the supplied speaker, resulting in a volume too low and a really" tinny" sound.

I fitted a SBS4DCC Sugar Cubes with a MASSIVE improvement in the sound quality.

Discussion on the Yahoo groups and listening to the Speakers on Laurie McLean's Cube Speaker Sound Board at:

https://www.youtube.com/watch?v=N3B__iNYyNU

Not all Sugar Cube speakers are the same. Use the ones from Streamlined Backshop in the U.S. at:

http://www.sbs4dcc.com/sugarcubespeakers.html

I have experimented with a "stereo" installation, using a QSI Titan into a 22 cm (9") long HO Austrains C36, to see how the "stereo" effect sounded. The internal diameter of the C36's Smokebox is 20mm so I fitted a small QSI/Tonys round speaker that resulted in a really "tinny" Chuff and low in volume. Because of this "tinny" sound, I abandoned the idea of a "front" speaker for a stereo sound installation and went back to "mono" from the High Bass in the Tender.

Some time later I revisited the "front" speaker installation using a MRC 18 mm Round Speaker into another C36 and the sound from this speaker, compared to the previous "stereo" speaker, provided an adequate "front" speaker installation.

I fitted one of my new SBS4DCC Sugar Cubes to another C36 and compared the results using the same Tsunami Light decoders with identical "set up" CV values. The SBS Sugar Cubes sound much better and with the smaller overall size and format/footprint, makes them easier to install. These are the go for speakers in all my NSW loco fleet.

The video below compares the sound from a SBS4DCC's 15 x 11 x 8 mm Sugar Cube to Tony's 15 mm high 27 mm round High Bass, the photo below shows their relative size.


With the SBS Sugar Cubes, the Austrains C36 lends itself to an easy Smokebox speaker installation as the front is easily removed. Using my faithful form of of "re-useable" glue - Blu Tack, I "glued" the SBS Sugar Cube to the "inside" of the front of the Smokebox. I also added Blu Tack "around the Enclosure to reduce the vibrations, as shown below.


I wired up the speaker to the Tsunami Light decoder in the Tender via a changeover switch so I could switch between speakers while running the loco to demonstrate the two speakers for the video. I adjusted the volume a little louder than I usually have in my locos, to 100 out of 255 and  as usual I had adjusted the Tsunami's Equalizer to boost the higher frequencies, for the video.

The speaker did not distort when I adjusted the sound to the maximum and when the Whistle was blown, it was still clear with no distortion. I then adjusted the Tsunamis overall volume to where I normally have it for my locos (50 out of 255).

Unbelievable performance from such a small speaker.

My previous "go to" speaker due to it's great performance, was Tony's 27 x 15 mm High Bass speaker. It's size prevented it from being fitted to many locos, especially in my thin body Diesels but now with the SBS Sugar Cubes we can have great performance and volume with a much smaller package, so poor sounding sound locos are a thing of the past.

Plus these small SBS Sugar Cubes can be installed in the "front" (Smokebox/Boiler) of the Steam loco where many have wanted their sounds to come from - just like in the prototype.

What I have found, while operating with "loud/high" volumes and watching/following the loco, the "front" sound installation is very noticeable. Operating with low volumes is not so noticeable. With the loud loco sound that I witness on some of the layouts I visit and some visitors who bring their locos to the Main North, the "front" installation will be most beneficial. In any event I will be converting many of my steamers to be "front" runners.

A comparison of Sugar Cube Speakers at SBS4DCC, can be seen/heard at:

https://www.youtube.com/watch?v=bZdx0kupIDc

The below video compares the sound from the SBS4DCC speaker with a Tony's 27mm High Bass speaker. While the 27mm from Tonys sounded "bassier" and slightly louder, the much smaller SBS4DCC performed admirably with just a little less bass and volume.


The below video compares the 11 x 15 SBS4DCC Sugar Cube and a TVW Miniatures 11 x 15 Cell Phone speaker in my new Auscision 45.


For lots of DCC stuff, see my Main North web site at:
http://www.members.optusnet.com.au/nswmn/